The planning challenges of a replacement dwelling

Last year, we were approached by a self-build client for assistance at the planning stage of their project, which was for a replacement dwelling on a plot of land currently occupied by an old farmhouse and various ancillary buildings.

Our architect met with the client and took a design brief for a two storey Georgian countryside property with simple authentic period detailing.

Last year, we were approached by a self-build client for assistance at the planning stage of their project, which was for a replacement dwelling on a plot of land currently occupied by an old farmhouse and various ancillary buildings. Our architect Russell Baker met with the client and took a design brief for a two storey Georgian countryside property with simple authentic period detailing. Once the client was happy with his proposal, the drawings were submitted for planning approval.

Changes to planning policy

A few years ago, the local authority changed its planning policy with regard to replacement dwellings. Previously, plans for building a new property on the site of a previous one could have entailed designing a house twice the size using arguments around Permitted Development Rights. However, the rules have now changed. You are allowed to build a replacement property 30% bigger than the existing dwelling as it stands. The policy states ’replacement dwellings should not be significantly larger (i.e. more than 30%) than the existing dwelling’.

The local authority has taken this action to take back a certain amount of control to avoid the risk of overly large replacement buildings being constructed in rural areas. Planning officers were concerned about the potentially negative impact on the openness of the countryside, especially in greenbelt.

For a self-builder, who very often wants to build a replacement dwelling, these rules may seem somewhat restrictive. Quite often the building to be replaced is really quite small. The rules are strict and self-builders need to understand the limits within which they have to operate.

Being creative with the space for planning challenges

This house to be replaced at this self-build project in Cheshire was not particularly large but did have an additional connected building at the back of the property. This was not an agricultural building and it was attached to the main house so when it came to measuring up its space could be included in the total overall floor area of the house. This was helpful as it gained some further space for our client’s house and meant that our architect could maximise the size of house that was achievable on the plot and allowable under the rules.

‘Granny flats’: the new rules

To gain some further living space, the architect also included plans for a separate granny flat to accommodate our client’s elderly mother. It consists of a bedroom, bathroom, living area and kitchenette.

The local authority has also changed some planning wording with regard to so-called ‘granny annexes’. ‘Annexe accommodation should be closely related to, and functionally dependant on, the main dwellinghouse……. annexe accommodation should be limited in size to provide for the basic needs of the dependent person, remain subordinate to the main dwelling, and normally include only one bedroom’.

From a planning point of view, if a dependent relative can live in a smaller building within your grounds then that saves another house being built somewhere so this is to be encouraged. However, it is really important to be aware that once the annexe is built you cannot then sell it off as a separate house and you cannot have anyone living in it apart from someone who is dependent on the main house.

Thinking outside the box for planning challenges

Thinking creatively about how to use the land available is another key part of maximising your self-build development opportunity. This property also included a brick built barn which already had planning approval for a residential barn conversion with a generous allowance of land for a garden. We could see that by sacrificing the option of another residential property and keeping the building as a useful storage facility instead, we could free up a sizeable amount of land to be a fantastic garden for the main house. Our client was very happy with this solution.

The best team designs the best self-build solution

An expert architect and developer will work with you to get the best possible solution, no matter the restrictions of planning policy. There is no doubt that the quality of the design and eventual build really matters when it comes to securing planning. Our architect Russell explains,

“When it comes to getting planning approval, and you need to push the boundaries of the planning restrictions as far as you can to secure the house design you want, it is all about balance. If you make your house design really attractive, it is far more likely to get the planning officer to look more favourably on your application. For example, in this particular case, the house we are building is taller than the property it has replaced. Strictly speaking, this is not generally permitted under planning rules. However, the overall proposed development creates a much greater openness within the countryside than the original buildings and the completed house will be much more attractive than the one it is replacing.

“When a local authority is presented with plans for a house that will be beautiful and know that it will be constructed by a trusted developer with a long-standing reputation like CB Homes, they are very likely to be a little more pragmatic in their decision making. After all, if they turn it down, they risk receiving an application in the future that may fall within the most stringent planning restrictions but equally may not be a very attractive house at all, and do nothing to enhance its surroundings.”

Have you found the perfect plot for a self-build but you’re not sure what to do about the existing property? Get in touch with us to find out how we can help turn your self-build dreams into reality.

The Self-Build Guide to The Build: 5. Finishing Touches

As we reach the conclusion of our Self-Build Guide to The Build, you should by now have a very clear idea what your finished home looks like. It’s almost completely decorated and the bathroom and kitchen are in place. It looks like a home, but there are several aspects – both inside and out – that need to be completed to put the finishing touches to your project.

As we reach the conclusion of our Self-Build Guide to The Build, you should by now have a very clear idea what your finished home looks like. It’s almost completely decorated and the bathroom and kitchen are in place. It looks like a home, but there are several aspects – both inside and out – that need to be completed to put the finishing touches to your project.

Inside story

One of the biggest changes to the property will be the arrival of power. The gas and electric will be connected. Everything – the boiler or cylinder – for example, will be fired up, tried and tested, to ensure it’s in full working order. This is very much a moment of truth, as the central heating and electrics will have been tested in isolation, but will not have necessarily received general, day-to-day usage. Showers, cookers and any plumbed-in freestanding items, such as washing machines and dishwashers, can also be tested for operation. Each of the trades that have installed services and utilities will have to submit official certificates to prove that all they have been tested and passed as being safe. This certification will mean the work is guaranteed to the highest British Standards for their respective industries.

Decors and details 

Another big addition to the interior decoration is finishing the paintwork, which you’ll have chosen to complement the spaces and décor. This is when your chosen colour schemes combine on a grand scale. You’ll see all the various components coming together. Some of the painting will just be ‘making good’. Other parts might include larger areas. There’s some joinery still to be installed, such as banisters and spindles to hardwood staircases, or vanity units, shelving and fitted wardrobes. Some of these may require painting to finish, while others may be stained or varnished. There may also be fixtures and fittings such as ironmongery to doors, hanging rails, feature walls, oak headboards, fireplaces and fixed mirrors to be added. All this takes time and it’s surprising that, although the building looks finished, each of these small details is a job in itself. 

Snagging list at finishing time

On a CB Homes project, once the interior is deemed finished according to the builder’s work schedule, the site manager, project manager, the sales team and finally the client will do their snagging walk throughs. This is simply to double-check that every single aspect of the project has been carried out to the agreed and expected highest possible standards.

CB Homes has very strict procedures in place at this snagging stage, to make sure nothing is missed – even down to testing every socket and radiator. Being absolutely thorough in this regard ensures we don’t miss any detail, no matter how small. If any items are raised by the client, they will be addressed via an itinerary of corrections that need to be made. This is known as a snagging list. Once our client is satisfied with the end results, the interior undergoes an extensive and meticulous deep clean so it is absolutely spotless.

Nearing the finishing line

During the building process, the outside of the property and the surrounding area will look like a working building site. Materials need to be stacked and stored. There may be site cabins, machinery and vehicles, and the ground may be a temporary hard standing or – depending on the time of year – quite muddy. Part of finishing the exterior will include fitting the final bits of drainage, which can include guttering and downpipes. There may be some external decoration to be painted too, such as fascia boards or window frames. If the property has been rendered or features timberwork, that may require painting or treating too. The whole exterior of the building is cleaned with a power washer, to get rid of any dust and debris, such as mortar spots or splashes.

Ground force for finishing touches

The exterior landscaping and approaches will also need to be addressed in this final stage. Outside features such as patios, boundary walls, fences, hedging, gardens and lawns will be installed. The same goes for whatever driveways and parking areas are required. If the property has special features, such as electric gates, they will need to be fitted and connected to power too. These exterior elements will likely have started during the second fix, but now it will all come together to a finish.

Finishing the final inspection

When the project has been completed, the final inspections are carried out with the building surveyor, local authority building inspector, and the warranty providers. The house will also be air tested, to make sure it fits in with building requirements for air tightness. This stage will effectively give the building a clean bill of health and hand it over to its new owners.

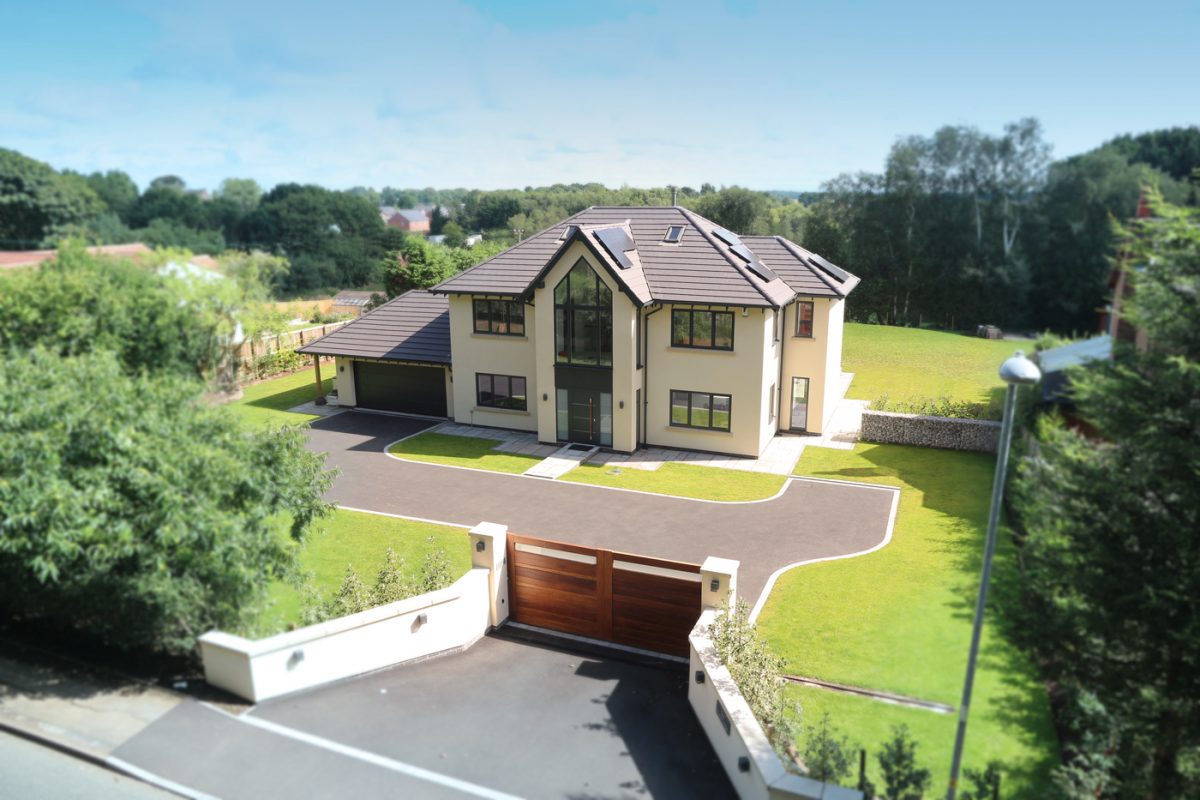
When all this is completed and the finishes, flourishes and final touches have been applied, the project is officially ready for you to move in and enjoy your new dream home.  

If you have always dreamed of building your own home, contact us to find out more about our complete turnkey solution for your self-build project.

Building your own home: opting for a turn key package

Once our client Suzanne had decided to build her own house on the plot she had bought at an online auction, she selected CB Homes’ turnkey service to deliver her self-build.

Knowing the total price up front, as well as having every aspect of the self-build taken care of, was a very attractive proposition for her and her husband.

Once our client Suzanne had decided to build her own house on the plot she had bought at an online auction, she selected CB Homes’ turnkey self-build service to deliver her self-build. Knowing the total price up front, as well as having every aspect of the self-build taken care of, was a very attractive proposition for her and her husband.

Having bought the property in March 2020 and spent some time deciding whether to renovate the old building or to go with the self-build plan, the plans were ready to submit for planning permission by August. The planning process did take some weeks longer than usual, owing to COVID-19.

Planning application paperwork

Suzanne says,

“Buying the property during the first lockdown was probably quite bad timing! Luckily, the CB Homes team continued to work the whole way through the pandemic. I was taken aback by all the paperwork involved in housebuilding, in addition to the planning application. Luckily, it’s all being handled by CB Homes but I did not anticipate how long it would take. I suppose this is one of the big differences between a mass developer throwing lots of houses up very quickly and a developer that specialises in individual bespoke homes. I don’t mind though, this is a really big investment for us and if it takes longer then so be it. I’m very confident that it will turn out exactly how I have envisaged it.”

As part of our turn key service at CB Homes, our planning experts pull all the paperwork together and submit everything at once, which saves our clients a lot of time going back and forth with the Planning Officer. Suzanne continues,

“I was shocked by how expensive a bat survey can be. It’s obviously really important ecologically to make sure these things are carried out but I was quite pleased we didn’t need a newt survey as well! Luckily, CB Homes could advise us on which surveys were required and the company has contacts with the expertise to carry them out efficiently.”

Freedom to choose the finishings with a turn key solution

Part of our service is to provide clients with plenty of freedom to choose finishings for their new home. Now that the foundations have been dug, the time has come for our clients to start making exciting choices for their house. Sometimes the amount of choice available may seem slightly overwhelming, but Suzanne says,

“I have to say, the whole process is really very easy. We have basically had our hands held by the CB Homes team the whole way through so everything seems really simple.

“My husband works very long hours so is not always available to discuss things with. One of the best things about CB Homes is that there is a dedicated person for each aspect of the build – so there is a project manager and a site manager and I can just speak to the right person straightaway. The lines of communication are really good. It really is a pain free way of building your own house.

“With their years of experience of self-builds, the team can provide really good advice on what will or won’t work and also what is most practical yet effective.”

Considering value with a turn key package

When it comes to budgeting, Suzanne admits she is a little obsessed with her spreadsheets. She says,

“I like to know exactly where we are with the budget at any time. The staged payment process that CB Homes uses makes it easy. The company has been very helpful with advice and keeping an eye on potential re-sale value too. At this stage, we don’t know how long we will live in this new home and we don’t want to put potential future buyers off by choosing things that might be considered a bit outlandish by someone else. CB Homes really understands that and have helped guide me very step of the way.

“It has been so helpful to have professional advice on things like choices of materials and finishes. I never knew that choosing small floor tiles make rooms look smaller for instance. CB Homes has also recommended suppliers. With the team’s years of experience these things really matter.”

Sticking to the budget with our turn key service

“When it comes to extras, you do need to be careful – it would be easy to get carried away with things like upgrading door furniture and it can quickly add up. Luckily, little things are standard for CB Homes that would be considered an upgrade by another company – now I am making my choices of finishings, the quality of everything they build really comes through.

“It may seem a small thing, but I really appreciate having the site kept so neat and tidy. Even our new neighbours have been complimentary about that. CB Homes wrote to all of them to advise that work would be starting which I hope got us off on the right foot with them straightaway.”

With the foundations complete, the next job will be the bricklaying.

Suzanne commented,

“Before finding my perfect plot, I had never heard of a full turnkey package for self-building before. Basically, it means that taking on a self-build doesn’t need to be scary at all.”

Have you always dreamed of building your own home? Have you got a plot of land suitable for building on? Contact CB Homes today to find out how we can help you.

The Self-Build Guide to The Build: 3. The First Fix

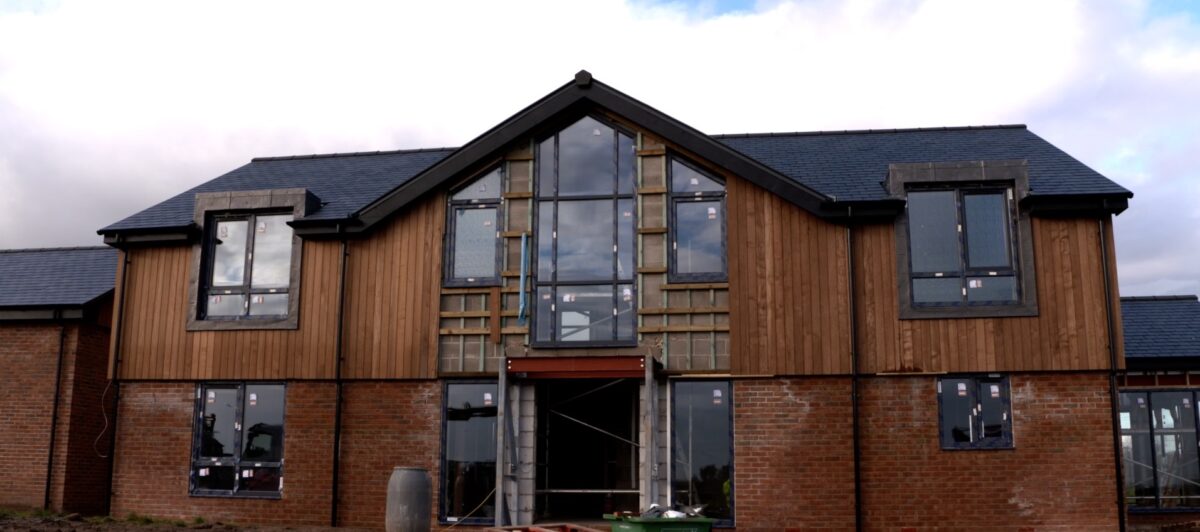
With the completion of your roof structure and covering, you can finally see how your new house will look – at least from the outside. But now follows one of the most important stages of the construction process, the first fix.

With the completion of your roof structure and covering, you can finally see how your new house will look – at least from the outside. But now follows one of the most important stages of the construction process, the first fix. 

There are three basic stages to the first fix. They cover three key aspects of the house – joinery, electrics and plumbing/ heating. Plans are drawn up at the design stage for all the internal areas but they are not set in stone, however. They are not enforced by planning approval, so can be tweaked at this stage. This is useful if you have had further thoughts on interiors and layouts now you have a real idea of room sizes. There are of course cost implications if alterations and amendments are made to any of the components that are part of the first fix, but as long as they’re not too extreme, alterations can be made.

Fixing up your home

Joinery includes all the timber elements of the building. This includes the most obvious things like door casings and window sills. But it also includes aspects that will be covered up, such as timber stud partitions and structural noggins to enable plasterboard to be secured.

Like other aspects of the first fix, this work will be carried out by specialist tradesmen – in this case joiners who are expert in designing and fitting timberwork. Timber stairs will also go in at this stage, if they are made of softwood, but if you are having a feature hardwood staircase it is better to hold off fitting until later, in case of damage.

Getting connected

Electrics, in all their myriad forms, are another key aspect of the first fix. Years ago, an electrical fix in its simplest form would have been light switches, plugs and a phone socket. But these days there is considerably more sophistication and complexity, as we have many more devices that need power in our homes. This is driven by today’s technology. In older spec-built houses, even as recently as the 1980s, there never seemed to be quite enough plugs and they are sometimes found in rather random positions.

Today, as part of our turnkey self-build service, we will provide an electrics schedule, with details of all the electrics in each room. We will walk you through the property, listing out all the points – where you want the sockets, where the TV will be positioned, the number and position of power sockets, TV aerials, phone lines, smart connections, charging points etc.

This means the interior spaces can be shaped exactly to your specification and needs. A study may require more power and phone connectivity, especially if you will be working from home at any point. The electrical layout will also include any exterior wiring that will need to be included in the circuit, and also the position of the mains circuit board and breaker switches. Everything can then be tested before plastering commences.

Smart devices

These days many customers are keen to fit Wi-Fi enabled connections throughout their home. Although it is always possible to retrofit, it is much to better to pre-wire at this first fix stage. If you have a pre-wired smart enabled system installed you can have wireless coverage access points throughout your home so that all your smart home features, from your lighting and heating to your fridge and garage door, can be controlled wirelessly, along with your everyday streaming and connectivity needs.

In the pipeline

The other most important aspect of the first fix is the installation of the plumbing and heating systems. Like the electrics, much of this work is concealed and the metres of pipework will be hidden from sight in the finished house. Years ago, much of the plumbing pipework would have been lead and then copper, but these days it’s mostly plastic. Once upon a time this would have been frowned upon but improvements in modern technology and lower prices means the use of plastic has come on in leaps and bounds.

Aspects of this part of the project include the position of radiators, or underfloor heating. The basic foundations and layouts of the bathroom and kitchen – two of the most visual aspects of any house – are set out in this process. The rising main connection will define the sources of the water supply and how this is circulated around the property, via pipework, to the taps, shower and toilet. Individual taps and the washing machine connection may also have isolation valves, to facilitate any replacement at a future date and/ or any leakages.

Working to design drawings, the plumbing and heating engineers will set out where items such as wastepipes will go, to match up with each appliance. Different manufacturers’ models have different requirements, so you will need to have decided on your final choices before this stage can be carried out. This will ensure no changes will need to be made after the plastering is done, as these will be costly and time-consuming additions to the schedule of work.

The end of your self-build is in sight

The many aspects of the first fix also includes such miscellaneous items as ventilation, heat recovery systems, insulation, loft insulation, Kingspan partitions, insulation blown into the cavity wall, and some floor coverings, such as levelling screeds and floor insulation. It is also at this stage that any window frames will also be fitted and glazed. These frames can be made of either uPVC or timber and are available in a multitude of different designs and materials. Again, small changes can be made to design aspects at this stage, so long as they conform to the overall dimensions available in the wall space. With the installation of the windows, your building will now be watertight, which is another exciting milestone in your self-build project.

At the conclusion of this stage, your Building Control officer and Warranty Provider will make very detailed visits to appraise the work. This is important, as once the plastering has been done much of this work will be hidden. The roof structure too will be carefully checked before the ceilings are plastered. This will ensure the workmanship and building is covered by the necessary warranties.

Essentially, by the end of the first fix – which is a complex process involving many different trades – you can heave a huge sigh of relief and the project will be ready for plastering.

Always dreamed of building your own home? Contact us to find out more about our complete turnkey self-build solution.

The Self-Build Experience: the second fix

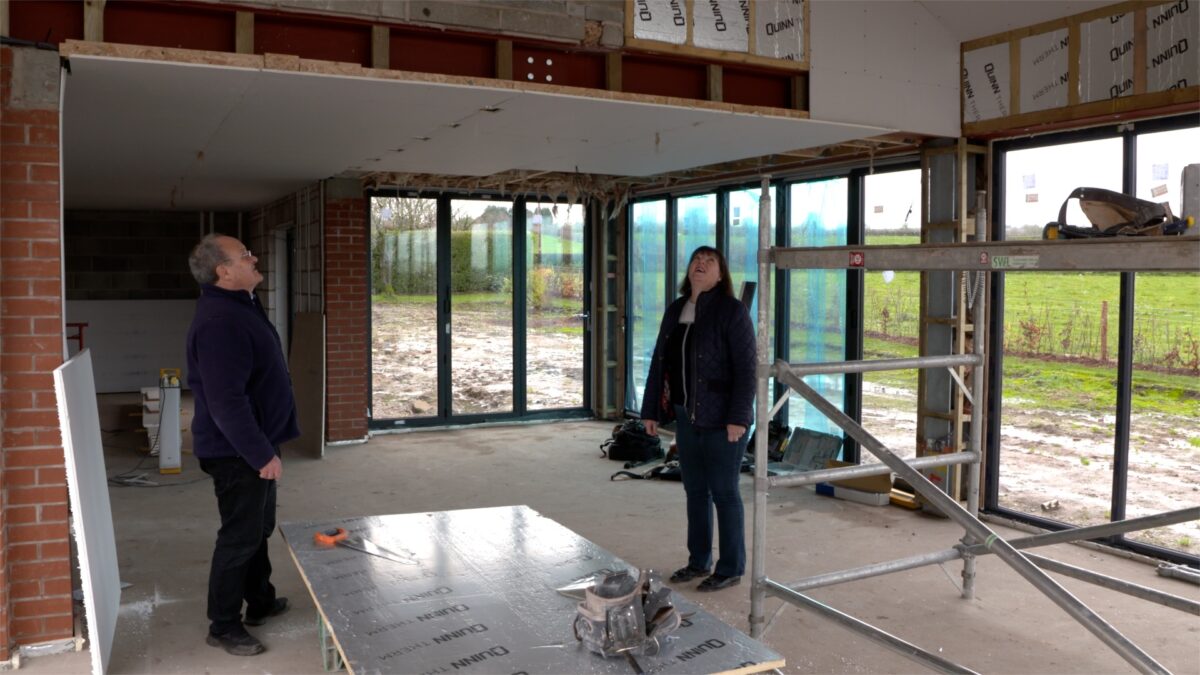
Our clients’ fabulous self-build project in the village of Kingsley, Cheshire is very nearly complete. It is now at the ‘second fix’ stage, which our clients describe as the ‘very exciting part’.

Our clients’ fabulous self-build project in the village of Kingsley, Cheshire is very nearly complete. It is now at the ‘second fix’ stage, which our clients describe as the ‘very exciting part’.

What is the ‘second fix’?

The second fix is the stage of the build that starts once all the plastering is finished. It involves all the electrics being connected, the basins and bathrooms being installed, the flooring laid down, doors fitted and the built-in wardrobes being completed. It is always incredible to see how quickly everything comes together in the final few weeks of a self-build project.

A collaborative approach to building your own house

With experience of building their own home in the past, our clients say they feel a lot more relaxed this time as they have let our self-build team project manage the whole build from the start.

Advice for anyone who wants to build their own home

Throughout the project, our clients have said that planning exactly what you want is key to making sure the house is just what you have dreamed of. From planning precisely where the electric sockets should go, to which way you want the doors to open, plan every detail. Find out more about these clients’ self-build experience by watching the fifth instalment of their self-build video journal here.

Your Self-Build Planning Application decision

Remember, the best way of avoiding planning application refusal is to take advice from a planning expert, long before your application has been submitted. If they conduct a site appraisal, they are best placed to advise you whether or not your project is likely to get a green light, based on their years of experience and knowledge of planning policy.

The Self-Build Guide Planning – Part 3

The best way of avoiding planning application refusal is to take advice from a planning expert, long before your application has been submitted. If they conduct a site appraisal, they are best placed to advise you whether or not your project is likely to get a green light. This is based on their years of experience and knowledge of planning policy.

If the Planning Officer has indicated that he or she is likely to refuse the application (but has not yet done so) then there is an opportunity to revise the application, without having to go through the whole process again.

If the application is actually refused by the Planning Officer then you cannot amend the application.  You need to submit a new application, which may or may not attract a fee.  There is provision for a “free go” within 12 months of a refusal so long as it is on the same site and of a similar development to that refused by the Local Planning Authority.  This free go on a site can only be used once. 

Can I change the design of my self-build project?

If your application is refused, the reasons for refusal have to be spelt out. It is usually a specific policy that has been breached. The decision notice itself is short but the planning officer’s report will provide you with more background. You can find this on the council’s website.  If you re-submit the application to appeal against the refusal, you can provide additional information as grounds for your appeal. However, you cannot change the design during an appeal as it the scheme that was determined by the Local Planning Authority that must be considered. Of course, you can go back with a fresh application for an alternative design.

What appeal processes are available against a planning application decision?

If your self-build planning application is turned down, you have the option of making an appeal. The time limit on doing this is six months from the date of the refusal. You can go through one of the three appeals processes. These are either a written submission, an informal hearing, which does not happen very often, or a public enquiry, which can get very expensive.

What is a written submission?

A written submission responds specifically to the reasons for refusal. Once submitted, there is a six week time period during which third parties can respond. During this six week period the Council is also able to produce its Statement as well as third parties. You will then be given a final opportunity to make comments on any additional submissions from third parties or the Council.  A planning inspector will visit the site and provide an appeal decision in writing. If you decide to go down this route, you don’t have to pay any fees but you may have to pay for expert help.

When is it worth making an appeal against a planning application decision?

You should only go down the appeal route if it is the only option left to you. You have to be sure that you can provide genuine arguments on key planning points as your grounds of appeal. 

If the planning officer has recommended approval but it is the planning committee that has turned it down, it might be worth considering an appeal. If the planning officer has not recommended your plans being approved, then you need to look really carefully at their reasons. If they involve a particular interpretation of planning policy or a point of law, then your best bet is definitely to take expert planning advice rather than managing the appeal yourself.

Just over one in three appeals are successful. Going through the whole appeals process is time-consuming. It can take several months and may end up costing you more money. Occasionally you can get costs back from the council but similarly, the council can make a claim against you for costs as well. Even if you win the appeal you won’t automatically get costs awarded back to you.

What is ‘discharge of planning conditions’?

If planning permission is granted, discharge of planning conditions will need to be met. There will be some conditions which are “pre-commencement conditions”.  These are the conditions which need to be discharged before development can start. 

Not all conditions are pre-commencement conditions.  Some will relate to implementing the planning permission in accordance with the approved plans or in accordance with other reports which have already been submitted to the Local Planning Authority. 

Planning conditions vary from matters such as highways work to improve access or getting a ground investigation report completed to specifying what materials have to be used in the construction.

Meeting planning conditions

You must make sure that all conditions are met or planning consent cannot be implemented. For example, the building position and specific floor levels are very typical planning conditions. In a worst case scenario, if the building is not built exactly in the specified position with the precise floor levels as set out in the conditions, the permission is invalid and the building might have to be rebuilt.

It is common for a local authority to make approval of external materials a condition of planning. These include external cladding, brickwork, render, tiling, external joinery colours etc. They may or may not require to see actual samples. If you are building in a Conservation area or Area of Outstanding Natural Beauty, restrictions are likely to be tighter. Again, if you don’t get approval of these things in advance, you may have to replace them, so it’s never worth taking a risk in the hope you will just be lucky.

Contact us to find out more about our free planning advice and full self-build turnkey package. This includes the management of the whole planning application process, including an appeal, if it proves necessary.