The Self-Build Guide to The Build: 6. From Dream to Reality

Now that their self-build home is complete, we can look back to the start of our client’s adventure, from pre-start to completion, to provide the whole story.

The keys have been handed over, and our clients can finally call their new self-build house their home.

Now that their self-build home is complete, we can look back to the start of our clients’ adventure, from pre-start to completion, to provide the whole story.

Pre-Start

Our clients decided to go down the self-build route, but having had experience of this before, which had been quite stressful, they sought the assistance and guidance of CB Homes to realise their self-build dream in Cheshire.

They were extremely excited to get started, knowing that they were going to get a modern, warm comfortable house built to brilliant standards, so in retirement they would be comfortable.

Laying the groundwork

Before work could start, a new road had to built, as the original gravel track couldn’t have accommodated the trucks and lorries to build our client’s new home. But within two weeks we had a new road in, and the work could commence!

Raising the roof

Steve and Sue found the whole self-build process so much easier with us project managing it and co-ordinating all the contractors.

Sue said: “We had utter confidence in CB Homes to deliver, and they really exceeded our expectations.”

The First Fix

At CB Homes, we aim to take all the stress out of self-building as much as possible, just

Steve and Sue said that they really enjoyed having the absolutely ‘clean slate’ of a self-build project, and the totally free rein when it came to choosing precisely what their new home would look like. These included the fun and practical decisions, such as where to fit which sockets, where is the kitchen sink going to go, and how is the bathroom going to look, as well as everything in between.

Sue said: “My job was to plough through all the brochures and give Steve a choice of about three.”

As Steve reflected: “You can have grey, grey or grey. All right, we’ll have grey!”

The Second Fix

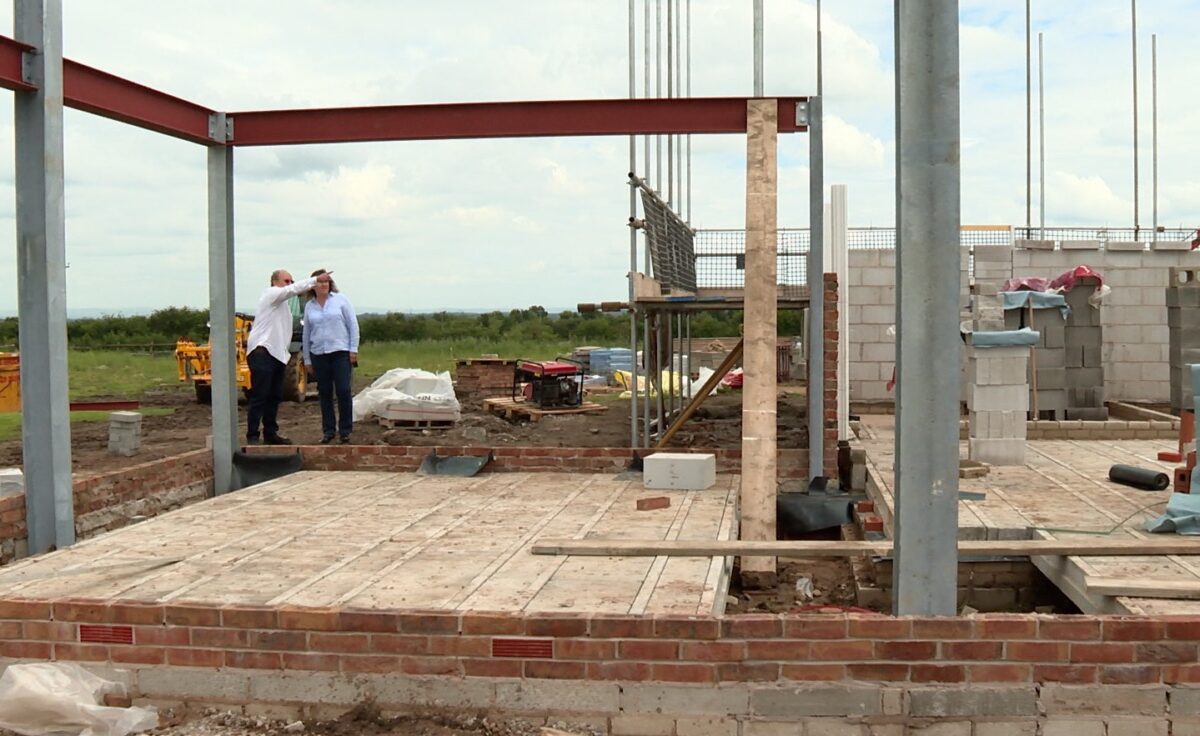
Steve and Sue really enjoyed visiting the site to see how the build was progressing. Every day there was something new, and were really impressed with the speed and care at which things developed.

With all CB Homes self-builds, we provide a schedule giving our clients an idea of when things needed to be done on site. This really helps our clients to plan well ahead of when the actual date for their items they would like to be fitted needs delivering, ready for installation.

Completion

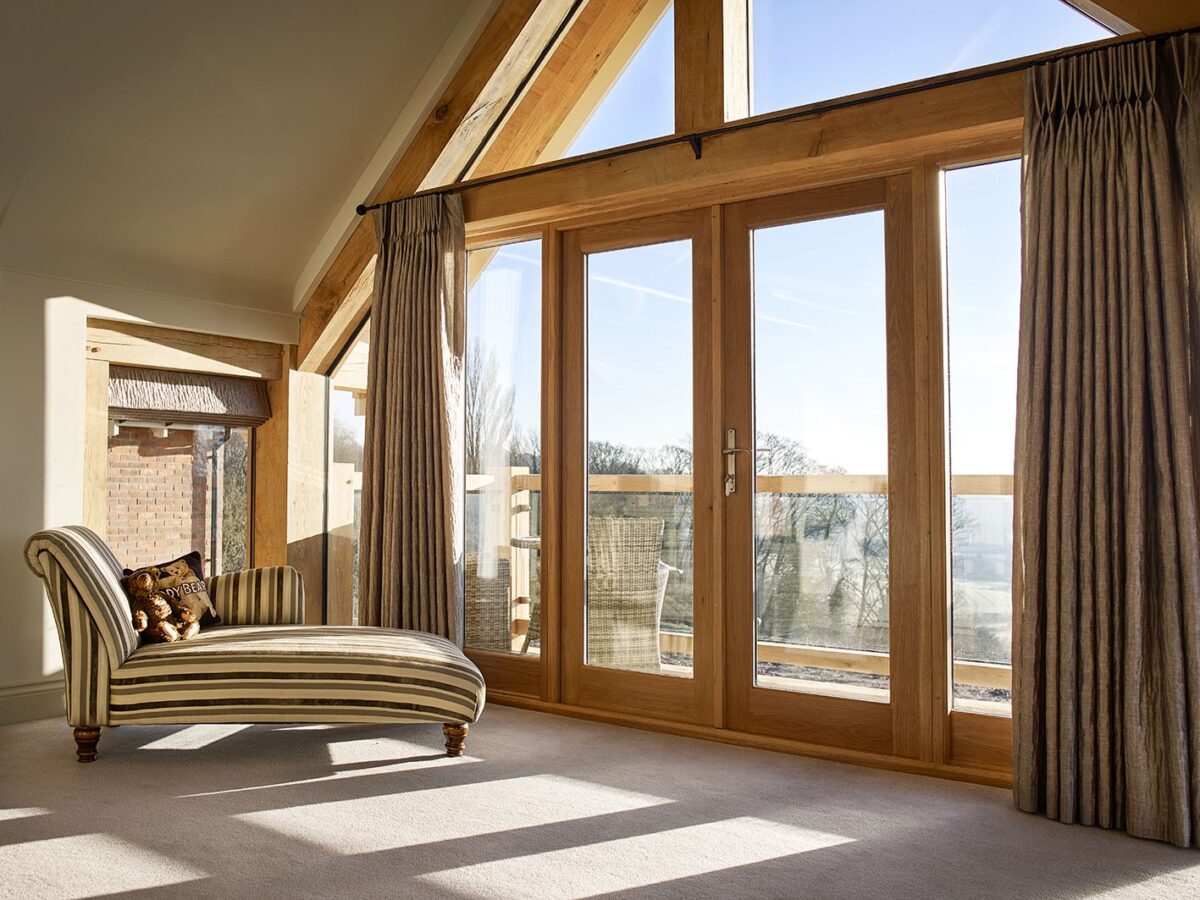
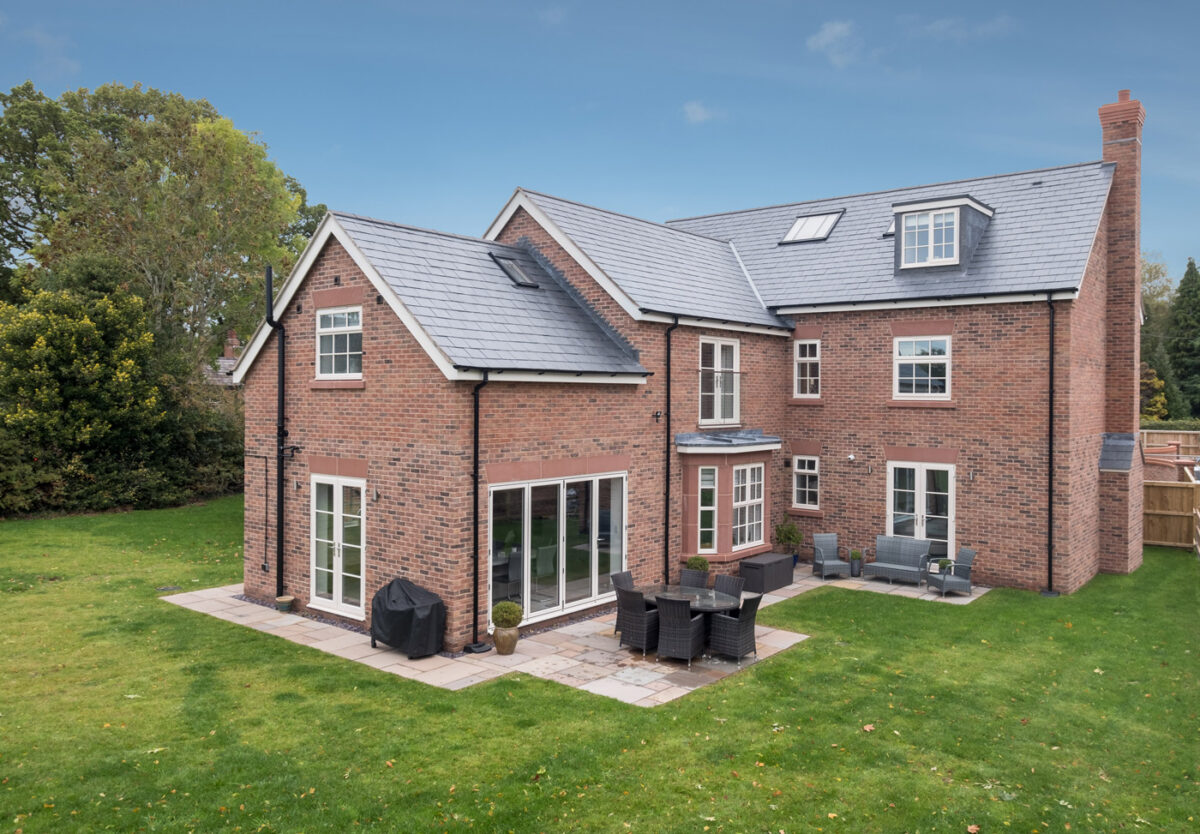
Steve and Sue love the design and finish of their stunning new home.

The fixed fee price included the cost for supplying and installing kitchen units, sanitary ware, wall tiles, fireplace and flooring. This gave them the flexibility and peace of mind to build the dream home that they were looking for around their budget.

Steve and Sue concluded: “CB Homes’ turnkey self-build package was the ideal solution. We are absolutely thrilled with the result of our new home, and CB Homes has helped us to truly realise our self-build dream. We couldn’t recommend working with CB Homes highly enough.”

See the round-up of our clients’ self-build video journal here.

Designing a Georgian country house for the 21st century

Recently, a client came to us looking for assistance with design and planning for a replacement dwelling. They had a clear idea of what they wanted to build, a two storey Georgian countryside property with simple authentic period detailing, appropriate to its rural surroundings in the heart of Cheshire.

The brief was to create a beautiful four bedroom home, fit for 21st century living but which would reflect the style and formality of the Georgian era. This meant that the front of the house would be rectangular and very symmetrical in appearance.

Recently, a client came to us looking for assistance with design and planning for a replacement dwelling. They had a clear idea of what they wanted to build, a two storey Georgian countryside property with simple authentic period detailing, appropriate to its rural surroundings in the heart of Cheshire.

The brief was to create a beautiful four bedroom home, fit for 21st century living but which would reflect the style and formality of the Georgian era. This meant that the front of the house would be rectangular and very symmetrical in appearance.

Authentic Georgian detail  

The owners wanted authentic, joiner-made, period sash windows, including carefully observed Georgian proportions, using the Golden Ratio. Owing to this perfect symmetry, on paper at least, Georgian houses look like a deceptively simple rectangular box. What sets them apart and makes them look really special is when every tiny detail of their appearance is exactly right. Every pane of glass, every panel of bricks and every detail of moulding needs to be in the right proportion to everything else. Achieving these perfect proportions is absolutely key to building a stunning home.

As our clients wanted the windows to have tall, elegant proportions, our architect Russell Baker recommended making the ground floor ceiling height taller and also lowering the level of the window sills. This meant they would maintain the slim and elegant look that our client wanted but would also remain in perfect proportion with the tall facades of the house.

The front door of a house is always an important part of design and this project will be no exception. Georgian front doors were really imposing and were a definite style statement for the homeowner. Today, you can still be very authentic as to the Georgian design, with the added advantage of using modern, hard wearing, materials.

Rural farmhouse appeal

Georgian houses, especially town houses, are known for their formality. As this is to be a rural home, based on a Georgian farmhouse look, it can be slightly less formal, a little more cosy and a little lighter on things like the details of the mouldings, which on a more urban authentic Georgian townhouse are often heavier and more ornate.

To maintain the appropriate size and scale of proportions to the Georgian, symmetrical front elevation, our architect designed a further rear L-shaped section. This was to accommodate our client’s more modern preference for open plan living. This includes the kitchen and a dining/ family area with views from glazed walls across the countryside to make the most of afternoon and evening sunshine.

Finding an architect and developer who understand exactly what you want from your self-build is very important. If you have always dreamed of building your perfect country home, contact CB Homes to find out how we can help with our complete turn key self-build package.

The Self-Build Guide to The Build: 5. Finishing Touches

As we reach the conclusion of our Self-Build Guide to The Build, you should by now have a very clear idea what your finished home looks like. It’s almost completely decorated and the bathroom and kitchen are in place. It looks like a home, but there are several aspects – both inside and out – that need to be completed to put the finishing touches to your project.

As we reach the conclusion of our Self-Build Guide to The Build, you should by now have a very clear idea what your finished home looks like. It’s almost completely decorated and the bathroom and kitchen are in place. It looks like a home, but there are several aspects – both inside and out – that need to be completed to put the finishing touches to your project.

Inside story

One of the biggest changes to the property will be the arrival of power. The gas and electric will be connected. Everything – the boiler or cylinder – for example, will be fired up, tried and tested, to ensure it’s in full working order. This is very much a moment of truth, as the central heating and electrics will have been tested in isolation, but will not have necessarily received general, day-to-day usage. Showers, cookers and any plumbed-in freestanding items, such as washing machines and dishwashers, can also be tested for operation. Each of the trades that have installed services and utilities will have to submit official certificates to prove that all they have been tested and passed as being safe. This certification will mean the work is guaranteed to the highest British Standards for their respective industries.

Decors and details 

Another big addition to the interior decoration is finishing the paintwork, which you’ll have chosen to complement the spaces and décor. This is when your chosen colour schemes combine on a grand scale. You’ll see all the various components coming together. Some of the painting will just be ‘making good’. Other parts might include larger areas. There’s some joinery still to be installed, such as banisters and spindles to hardwood staircases, or vanity units, shelving and fitted wardrobes. Some of these may require painting to finish, while others may be stained or varnished. There may also be fixtures and fittings such as ironmongery to doors, hanging rails, feature walls, oak headboards, fireplaces and fixed mirrors to be added. All this takes time and it’s surprising that, although the building looks finished, each of these small details is a job in itself. 

Snagging list at finishing time

On a CB Homes project, once the interior is deemed finished according to the builder’s work schedule, the site manager, project manager, the sales team and finally the client will do their snagging walk throughs. This is simply to double-check that every single aspect of the project has been carried out to the agreed and expected highest possible standards.

CB Homes has very strict procedures in place at this snagging stage, to make sure nothing is missed – even down to testing every socket and radiator. Being absolutely thorough in this regard ensures we don’t miss any detail, no matter how small. If any items are raised by the client, they will be addressed via an itinerary of corrections that need to be made. This is known as a snagging list. Once our client is satisfied with the end results, the interior undergoes an extensive and meticulous deep clean so it is absolutely spotless.

Nearing the finishing line

During the building process, the outside of the property and the surrounding area will look like a working building site. Materials need to be stacked and stored. There may be site cabins, machinery and vehicles, and the ground may be a temporary hard standing or – depending on the time of year – quite muddy. Part of finishing the exterior will include fitting the final bits of drainage, which can include guttering and downpipes. There may be some external decoration to be painted too, such as fascia boards or window frames. If the property has been rendered or features timberwork, that may require painting or treating too. The whole exterior of the building is cleaned with a power washer, to get rid of any dust and debris, such as mortar spots or splashes.

Ground force for finishing touches

The exterior landscaping and approaches will also need to be addressed in this final stage. Outside features such as patios, boundary walls, fences, hedging, gardens and lawns will be installed. The same goes for whatever driveways and parking areas are required. If the property has special features, such as electric gates, they will need to be fitted and connected to power too. These exterior elements will likely have started during the second fix, but now it will all come together to a finish.

Finishing the final inspection

When the project has been completed, the final inspections are carried out with the building surveyor, local authority building inspector, and the warranty providers. The house will also be air tested, to make sure it fits in with building requirements for air tightness. This stage will effectively give the building a clean bill of health and hand it over to its new owners.

When all this is completed and the finishes, flourishes and final touches have been applied, the project is officially ready for you to move in and enjoy your new dream home.  

If you have always dreamed of building your own home, contact us to find out more about our complete turnkey solution for your self-build project.

New homes available now at Acorn Gardens, Leftwich

We are very excited to present Acorn Gardens, our brand new development in Leftwich, on the outskirts of Northwich. Acorn Gardens is a beautiful collection of two, three and four bedroom homes, ideal for anyone looking for their first home or wanting to move up the housing ladder.

Here at CB Homes we are very excited to present Acorn Gardens, our brand new development in Leftwich, on the outskirts of Northwich. Acorn Gardens is a beautiful collection of two, three and four bedroom homes. An ideal location for anyone looking for their first home or wanting to move up the housing ladder.

Our marketing suite opens on Friday 2nd July, so to arrange a visit, please call Helen on 07400 062 349 or email sales@cbhomes.co.uk.

This small and exclusive development of just 13 houses has been carefully designed to our usual award-winning standards. It has CB Homes’ trademark blend of beautiful architecture and stunning interiors.

Acorn Gardens – beautiful houses from CB Homes

Our homes are designed to fit every need of modern life. From the size of bedrooms to the high specification fixtures and fittings, each home has been created with an emphasis on quality and individuality. Homes at Acorn Gardens offer a huge range of beautiful and practical features. These include fireplaces with solid oak mantles, pre-wired smart home enabled systems, electric car charging points, kitchens by a local bespoke company, integrated zanussi appliances, built in wardrobes and much more.

Every house at Acorn Gardens comes with a ten year NHBC Buildmark Warranty and CB Homes’ own two year Customer Care warranty.

Location, location…

Acorn Gardens is located in a popular semi-rural residential area, in walking distance of a range of local amenities and in easy reach of good secondary and primary schools.

Leftwich enjoys good access to main transport routes, within a five minute drive of the development.

The glorious Cheshire countryside is right on the doorstep and outdoors enthusiasts will love exploring Delamere Forest.  Close by, Northwich Woodlands offers its own wonderful green space to be discovered on foot, by bicycle or on horseback.

Only five plots left at Acorn Gardens

With only five homes left available, to arrange a visit to our new marketing suite to discover more or to reserve your new home, call Helen on 07400 062 349 or email sales@cbhomes.co.uk.

Building your own home: opting for a turn key package

Once our client Suzanne had decided to build her own house on the plot she had bought at an online auction, she selected CB Homes’ turnkey service to deliver her self-build.

Knowing the total price up front, as well as having every aspect of the self-build taken care of, was a very attractive proposition for her and her husband.

Once our client Suzanne had decided to build her own house on the plot she had bought at an online auction, she selected CB Homes’ turnkey self-build service to deliver her self-build. Knowing the total price up front, as well as having every aspect of the self-build taken care of, was a very attractive proposition for her and her husband.

Having bought the property in March 2020 and spent some time deciding whether to renovate the old building or to go with the self-build plan, the plans were ready to submit for planning permission by August. The planning process did take some weeks longer than usual, owing to COVID-19.

Planning application paperwork

Suzanne says,

“Buying the property during the first lockdown was probably quite bad timing! Luckily, the CB Homes team continued to work the whole way through the pandemic. I was taken aback by all the paperwork involved in housebuilding, in addition to the planning application. Luckily, it’s all being handled by CB Homes but I did not anticipate how long it would take. I suppose this is one of the big differences between a mass developer throwing lots of houses up very quickly and a developer that specialises in individual bespoke homes. I don’t mind though, this is a really big investment for us and if it takes longer then so be it. I’m very confident that it will turn out exactly how I have envisaged it.”

As part of our turn key service at CB Homes, our planning experts pull all the paperwork together and submit everything at once, which saves our clients a lot of time going back and forth with the Planning Officer. Suzanne continues,

“I was shocked by how expensive a bat survey can be. It’s obviously really important ecologically to make sure these things are carried out but I was quite pleased we didn’t need a newt survey as well! Luckily, CB Homes could advise us on which surveys were required and the company has contacts with the expertise to carry them out efficiently.”

Freedom to choose the finishings with a turn key solution

Part of our service is to provide clients with plenty of freedom to choose finishings for their new home. Now that the foundations have been dug, the time has come for our clients to start making exciting choices for their house. Sometimes the amount of choice available may seem slightly overwhelming, but Suzanne says,

“I have to say, the whole process is really very easy. We have basically had our hands held by the CB Homes team the whole way through so everything seems really simple.

“My husband works very long hours so is not always available to discuss things with. One of the best things about CB Homes is that there is a dedicated person for each aspect of the build – so there is a project manager and a site manager and I can just speak to the right person straightaway. The lines of communication are really good. It really is a pain free way of building your own house.

“With their years of experience of self-builds, the team can provide really good advice on what will or won’t work and also what is most practical yet effective.”

Considering value with a turn key package

When it comes to budgeting, Suzanne admits she is a little obsessed with her spreadsheets. She says,

“I like to know exactly where we are with the budget at any time. The staged payment process that CB Homes uses makes it easy. The company has been very helpful with advice and keeping an eye on potential re-sale value too. At this stage, we don’t know how long we will live in this new home and we don’t want to put potential future buyers off by choosing things that might be considered a bit outlandish by someone else. CB Homes really understands that and have helped guide me very step of the way.

“It has been so helpful to have professional advice on things like choices of materials and finishes. I never knew that choosing small floor tiles make rooms look smaller for instance. CB Homes has also recommended suppliers. With the team’s years of experience these things really matter.”

Sticking to the budget with our turn key service

“When it comes to extras, you do need to be careful – it would be easy to get carried away with things like upgrading door furniture and it can quickly add up. Luckily, little things are standard for CB Homes that would be considered an upgrade by another company – now I am making my choices of finishings, the quality of everything they build really comes through.

“It may seem a small thing, but I really appreciate having the site kept so neat and tidy. Even our new neighbours have been complimentary about that. CB Homes wrote to all of them to advise that work would be starting which I hope got us off on the right foot with them straightaway.”

With the foundations complete, the next job will be the bricklaying.

Suzanne commented,

“Before finding my perfect plot, I had never heard of a full turnkey package for self-building before. Basically, it means that taking on a self-build doesn’t need to be scary at all.”

Have you always dreamed of building your own home? Have you got a plot of land suitable for building on? Contact CB Homes today to find out how we can help you.

The Self-Build Guide to The Build: 2. Substructure to Superstructure

Now it’s time to begin the construction phase of your self-build project in earnest. Once the footings have set, you’re ready to build the substructure. There are several ways of doing this and a number of variations. The two main types are either via a solid concrete slab or block and beam.

Now it’s time to begin the construction phase of your self-build project in earnest.

The substructure of a self-build

Once the footings have set, you’re ready to build the substructure. There are several ways of doing this and a number of variations. The two main types are either via a solid concrete slab or block and beam.

A solid slab is generally the cheapest option in terms of materials but it probably requires the most amount of work and takes the longest time. The space inside the outer blockwork is filled with compacted hardcore and a layer of sand. The damp proof course (DPC) is installed on top of this, to prevent damp getting into the building and then the concrete slab is poured. After superstructure the slab is covered by an insulation layer and a floor screed tops it off, ready for a floor finish. Any ducting for services, such as underfloor heating, needs to be installed before the concrete slab is poured.

A block and beam floor is quicker to build, being dry laid. It may be the most appropriate choice, particularly in areas of poor soil quality or where tree roots have to be taken into consideration. After the footings are poured and the external walls up to the DPC are built, a suspended floor, made from precast concrete beams, is laid. The gaps between the beams are filled in with foundation blocks, creating a single flat slab. After superstructure the block and beams are covered by an insulation layer and a floor screed tops it off, ready for a floor finish. As with the solid slab, the ducting for any services needs to be installed before the screed is poured.

The superstructure of your self-build

The next part of the process is the assembly of the outer shell of the building, with interior and supporting walls, floors and topped out with the roof structure and covering. It’s now that the project really starts to take shape.

There are several different construction methods, such as timber framed, but the vast majority of new-build projects use brick and block. For this traditional building method, there is usually an inner skin of blockwork, with an outer skin of facing bricks. If the external finish to the walls is to be rendered and painted, then the outer walls can be constructed in blockwork too.

You’ll have chosen your facing brick in advance, from the dozens of variants available. The thermalite blocks look heavier than they actually are, as the porous design is meant to limit thermal conductivity and consequently, heat loss through the external wall. They can also be drilled easily and even sawn in half. The walls will be a cavity construction, which will allow an insulator, such as mineral wool, to be inserted at the construction stage. Bricks and blocks will be bonded with mortar, which sets solidly in 24 hours. Wire or plastic ties will need to be inserted every few courses, to hold the two skins of brick and/or block together.  

An inspector calls – building inspector visits

At various stages in the project the Building Inspector will visit the site, to ensure the work is being carried out to Building Regulations. We’ve already seen that they need to visit the foundations prior to the concrete pour. They may also need to see the floor and ceiling joists, to ensure they are in accordance with the approved drawings. They may also want to check the construction at roof height and the thermal and sound insulation, to make sure it is of the correct type and thickness. In general, as any queries with the design arise during construction, the inspector will be on hand to visit and discuss solutions with your construction team.

As the building grows and the walls gain altitude, a series of lifts of scaffolding will be required – each higher than the last. This will enable the operatives to work safely at height. Bricklayers will continue with the superstructure brick and blockwork, constructing any gable ends and chimneys in the process. Masonry finishes at eaves height, where the walls finish and the roof structure will begin. Lintels and flue liners will also be needed to be in place for any fireplaces and flues to be included in the design.

At higher levels, floors will also need to be formed, to create storeys to the building. Joists can either be built into the blockwork inner skin, or suspended on hangers (metal brackets fixed to the wall). Timber joists will be laid to centres and in some houses they may be visible – this is the distinctive beamed ceiling you see in older properties, but newer extensions and new-builds can include them too.

Easi-joists are a comparatively new alternative to traditional timber joists. They are parallel chord trusses, which are plated together with a metal web. The combination of the lightness of timber with the strength of the metal web means floors can be designed with a larger span and improved damping and stiffness characteristics too.

The timber staircases giving access to any upper floors will need to be constructed and installed as well. 

The sky’s the limit – completing the superstructure

The wall plate is a horizontal timber at the top of the building that runs along the top of the wall. It’s bedded in mortar and secured to the inner skin of the construction. It is where the roof construction sits and evenly distributes the roof weight across the entire structure.

Roof structure

The roof structure can be built from components, such as spars and ridge, called traditional roof – hand built – or they can be lowered into place with lifting gear (or manhandled) if they are pre-made trusses. The spar ends protrude beyond the outer face of the brick or blockwork, forming the eaves of the building – a fascia will sometimes be fitted to the spars, which the guttering can be fixed to. 

The whole timber roof structure will be covered with sheets – this is roofing felt, or a synthetic substitute, which is held in place with wooden battens, to provide waterproofing and to allow breathing. The roof is now ready to be tiled or slated.

If you have always dreamed of building your own home, contact us to find out more about our complete turnkey self-build solution for your self-build project.

Laying the Foundations for Self-Build

The first chapter of this Self Build Guide is going to be looking at the build itself, as the project finally commences and your new home begins to materialise. We’re beginning with the groundwork – the first stages of construction and aspects of the build that require excavation.

Part 1 of the Self-Build Guide: Laying the groundwork

Self-building and groundworks

The first chapter of this Self Build Guide is going to be looking at laying the foundations for your self-build, as the project finally commences and your new home begins to materialise. In due course we’ll be looking at the superstructure and roof, and other aspects of the construction process through to completion. We’re beginning with the laying the groundwork – the first stages of construction and aspects of the self-build that require excavation.  

Ground-breaking exploits   

If you’re embarking on the self-build route and constructing your own home, the safest and most reassuring solution is to engage a professional building company such as CB Homes. We offer a turnkey solution and in addition offer a great deal of added experience of the kinds of challenges a self-build project can encounter.

Surveying the scene for your new home

First of all, the site will have to be set out by a surveying engineer, according to the architect’s design. Years ago, this would have been set out using building lines and levels, and later levels and theodolite, but these days the equipment – still levels and theodolites – is digital. This has led to a high degree of accuracy and a very small allowance for human error when setting out.

The shape of the building, to its exact dimensions, will be set out by the engineer using profile boards and level readings. These often resemble wooden T-pieces. Benchmarks will be set up, to allow levels to be taken and compared across the site, so that all levels and lines of sight are included. There should be no ‘blind spots’ on the site where a level can’t be taken. These comparison levels can be taken above ground or below. For excavations, the levels will be below the benchmarks. This is an accurate way to ensure that the levels and height dimensions correspond to the plans. Interior wall foundations will be set out at this stage too.

In some cases, the digital information can be fed into the setting out equipment, in others the team will be working from plans. As well as levels, internal and external angles of the walls will be set out, to ensure the building is square. Details such as window levels and widths, doorways and other details will be added to the construction layout. Engineers will be on hand during the building process, to be involved in other groundwork, such as the setting out of drives or drainage. This may occur from the outset of the construction, or at a later date, depending on available access and scheduled timescales.

Laying a strong foundation

It is important to note that foundations are a relatively unknown entity before groundwork commences. Ground investigations give you an insight/snapshot into what will likely be under the ground but you never know until you start digging. It is always better to have a contingency in place for the foundations for a worse case scenario. Once you are out of the ground then there should be no hidden surprises.

Once the building has been set out, excavation can commence. The main types of foundations depend on the size and shape of the construction. They can basically be either strip (straight line trenches in the ground) or pile (vertical columns into the ground) or raft (a concrete slab spread out under the whole building or part of the building, supporting a number of columns or walls). The spoil can be retained on site for landscaping purposes later. If not, transport will need to be arranged to remove the spoil from site.  For a new-build house, foundation depth will depend on factors such as ground conditions, soil type, load and proximity to trees.

Going underground for groundwork

At this point in the construction, the project may be delayed due to bad weather, especially heavy rains that results in the footings being flooding, or severe frost. It is always worth scheduling foundations to a period of dry weather as you always want to make these as effective as possible. The ideal scenario is to dig and pour concrete in the smallest time window as possible to ensure excavations are not left open for practical and Health and Safety measures.

As mentioned earlier, another possible delay is if the builder encounters something immovable, such as an underground obstruction like a well. Geo environmental surveys on many projects (if undertaken) will have been carried out in advance, in various degrees of detail. Sometimes ground type can fluctuate over small distances. Cheshire, for example, has shelves of red sandstone. If such an obstacle is found, the foundation design may require some amending, as rock is often strong enough to build off.  

Building inspector visit at groundwork stage

If you have piling foundations, a specialist company will be appointed to undertake the entire foundation. These should be accredited and have all correct RAMS and H&S in place. If they are raft or trench foundations, the foundations themselves and any steelwork reinforcement to be included in them will have to be installed by specialist fitters and have structural designs and calculations. Once they are ready for the concrete pour, you’ll need to inform the local building inspector and warranty, who will visit the site to examine and pass them. Once they have been, you’ll be able to pour the ready-mix concrete. Depending on the size and scope of the building, this will be mixed to a specific strength, as detailed by your project structural engineer.

The foundation will give you a clear idea of the reality of the size of your project and a sense of the floorplan. Completing the groundwork is an exciting milestone on your self build journey. Once the concrete footings have set, the next stage will be the beginning of the substructure.

When building your own home, it is always better to have a professional company to oversee the foundations stage to minimise your exposure and unexpected costs. With CB Homes’ turnkey self-build solution, we provide a dedicated site manager and project management team so you have one direct point of contact throughout the entire construction process, keeping you informed of what’s happening every step of the way.

The Self-Build experience: the first fix

Here at CB Homes we are excited to give you the first sneak peek into our clients’ beautiful self-build project, which is currently under way in the village of Kingsley, Cheshire.

Here at CB Homes we are excited to give you the first sneak peek into our clients’ beautiful self-build project in the village of Kingsley, Cheshire, which is currently at the first fix stage.

What is the ‘first fix’?

Floors, ceilings and walls of this remarkable five bedroom self-build have now been constructed. The project is currently at the ‘first fix’ stage. This means electrics, plumbing and heating systems are being skilfully fitted, along with many metres of plasterboard.

Realising the self-build dream

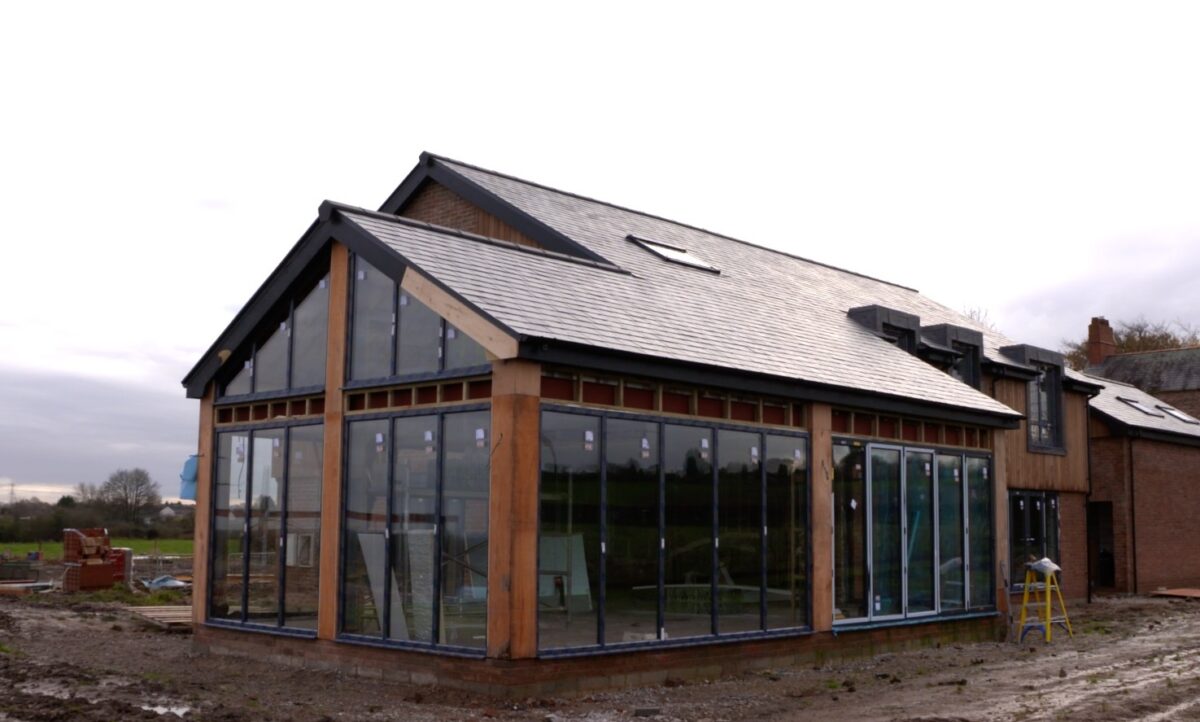
The beautiful anthracite bi-fold doors that surround a large part of the downstairs living space are now in place. They provide a stunning panoramic view of the Cheshire countryside. The house is really beginning to take shape and our clients are thrilled to be realising their self-build dream.

When it comes to self-build, there is so much to think about and many decisions to make. Find out more about the role of a CB Homes project manager and hear what it’s like to hand over many of the challenges of this kind of project to someone else in the latest instalment of our client’s self-build video journal here.

The Self-Build Guide Design: 4. Interior design for your self-build project

Just as we described about deciding on an overall design of your home, when it comes to the interior design, broadly speaking you have three choices. These are contemporary, ‘modern traditional’ or oak frame.

Just as we described about deciding on an overall design of your home, when it comes to the interior design, broadly speaking you have three choices of your self-build homes design. These are contemporary, ‘modern traditional’ or oak frame.

Choosing your self-build homes design

Contemporary self-build interior design

A contemporary interior design is notable for its very clean lines and floor plan. Most strikingly, there will be no architraves, skirting boards, cornices, mouldings or trims. The plaster on the wall will appear to meet. It will be completely flush with a polished concrete floor and the whole expanse of wall from floor to ceiling will be painted one colour. The lack of joints, the clean lines and hard surfaces can have huge appeal but people tend to absolutely love it or really hate it.

Modern traditional self-build interior design

The look that we call ‘modern traditional’ at CB Homes is very popular. The outside of the home looks very traditional, whether it’s a cottage or farmhouse style. The inside on the other hand, has a very modern look. This means that you can still enjoy all the benefits of a big, open plan modern kitchen-diner and make the most of space and light with extensive use of glass, featuring bigger windows and bi-fold doors running across the back of the house.

Uniform large format floor tiles or wood flooring throughout adds a modern feeling without the high cost of the completely contemporary look. Traditional finishes such as architraves, cornices etc are still used. The bathroom can be completely contemporary. The kitchen can either follow a modern boutique trend or embrace the homely, cosy feel of a traditional hand painted kitchen – either works perfectly.

Hearts of oak – another option for self-build homes design

An entire oak frame for your self-build house is more expensive than a brick-built home. A cheaper and highly effective compromise is putting oak beams as a feature in the lounge, such as an oak mantelpiece or occasional oak frames in the kitchen / diner. This is an inexpensive way of creating the feeling of an oak frame with a big style impact. An oak staircase is another feature with a massive wow factor. An oak gable will create a strong feel of an entirely oak framed house.

Room by room for interior design

For most of us, the kitchen is the heart of the home. This is probably the room that self-builders spend most time on planning out. Many self-builders have a clear picture in their head of what they want their dream kitchen to look like. As with every aspect of designing your home, it’s always useful to involve the professionals early on.

Panorama Kitchens’ Sales Director Kurt Kershaw shares some industry wisdom about planning your kitchen.

He says,

“When it comes to choosing a kitchen, think about what appliances you want. Do you want a tall fridge freezer, an island, an induction hob or a downdraft extractor? Is clever storage the most important aspect for you, with loads of drawers? Do you want lots of wall space for a big TV or some fantastic pictures? The well-thought out answers to these questions can start to inform the design.

“A good kitchen designer will take the architect’s plan and rough out a kitchen plan for you so you can really start to visualise it and then get into the detail of exactly what you want. Once all the details have been agreed, thanks to CAD design you will get visuals that will show you exactly how your kitchen will look so you can be sure it will be just what you want.

“The key word when it comes to what customers want from a modern kitchen is ‘sleek’. Over the last five years or so handle-less kitchens have really taken off as customers just love the uncluttered lines and spacious feel they create. More recently, for those who like an ultra-modern look, curved kitchens are exciting a lot of attention too.”

Fifty shades of which colour for your kitchen?

“Thanks to technological advances, these days we really can match any colour, we just need a reference from a paint manufacturer. Most customers are keen on white, grey and a multitude of muted soft colours. We are, however, seeing a trend for navy or indigo blue, which makes a very bold style statement, especially when teamed with brilliant white.

“Corian and quartz are the most popular worktops. We hardly see any granite these days, quartz has overtaken it completely and has come down a lot in price too. Customers love the fact that the colour on a quartz sample is completely true to the colour you will get and it never stains, unlike granite and marble.

“Acrylic kitchens are our biggest seller. They offer a wonderful depth of colour and they’re available in loads of colour ways with two tone being very popular. Despite that, grey is still the bestselling shade although I have seen some wonderful results in more unusual colours such as a beautiful dusty pink.

“Another hot trend is customers wanting 20 mm worktops rather than the traditional 30 mm. This means they will be the same depth as the doors, which again echoes that desire for sleek, symmetrical lines, which is incredibly effective.”

The pandemic has of course brought about some challenges for kitchen designers, particularly for appliances, where components may be coming from a huge number of different places so there is likely to be a really complex supply chain. Despite that, Panorama Kitchens is still working to a four week lead time for a new kitchen.

Lighting the way in interior design

The current trend for lighting in the kitchen is to have feature lighting just above the edge of the kitchen counter with pendants as a feature to add to the aesthetics and put the light exactly where you need it. Track lighting is becoming popular again and LED strip lighting is also being seen more and more. Recesses for TVs in the ceiling or wall recesses with feature lighting washing the wall in changing colours is also popular. Table lamps add charm and atmosphere, with the added convenience of being be operated off one mains switch.

Heart of the home

If you are very unsure how to approach designing the look you want for the inside of your self-build house, you can always employ an interior designer. Interior design is very important. You may decide you want to benefit from professional assistance to be confident that you will love the inside of your new home just as much as the outside.

Thinking of a self-build? Talk to CB Homes about your self-build homes design, and see how we can help you turn your dream of building your own home into a reality.
What are the hidden costs of self-build?

When you decide on your budget for building your own house it’s important to keep an accurate tally of where and on what the money needs to be spent. You also need to be aware of everything that needs to be included in your self-build project.

When you decide on your budget for building your own house it’s important to keep an accurate tally of where and on what the money needs to be spent. You also need to be aware of everything that needs to be included in your self-build project. You’ll know the costs of the building materials and the labour, but unless you do your research carefully, what hidden costs might take you by surprise?

Hidden costs of installing utilities

One aspect of building your own home that is often taken as a given is the availability of services at the flick of a switch. But installing services onsite can sometimes be costly. For the project itself, the construction team will rely on generators for power. This is because the equipment required to carry out construction tasks requires far more electricity than conventional power grids. If you’re working on a site in a remote or rural location, then there may be a need to bring in services to the site for the finished building. Even in this day and age, many properties in the countryside are not on a gas or mains sewer network.

Hidden costs of powering up?

Thinking about how you’re going to power your finished house should be addressed in the planning process. You need to financially account for it in the wider scheme from the outset.


Even if there is a service network available, the costs of connecting to electricity and gas can vary considerably. This is especially true of electricity connections. The cost for these will depend on the amount of work involved to make the connection. In terms of central heating and energy generation for the finished property, there are several options available, such as oil-fired or fossil heating. Greener options are becoming more popular and are more widely available, such as solar panels mounted on the roof or on the ground, to provide self-sufficient, self-generated power.

Getting connected

The problem of not being connected to a mains sewer can be overcome by using a septic tank on site, either an old-fashioned multi-chambered tank or a Klargester septic tank. Years ago, the multichambered tanks would have been built of brick and many of this type are still in existence across the UK today. A Klargester septic tank looks rather like a submersible. It is buried in the ground to treat the wastewater discharge onsite. Thinking about where this will be sited will need to be incorporated as part of the wider site layout before work begins. Foul water can be treated without a sewer connection in this way, but surface water – such as water collected in guttering or on patios – can often simply flow away into a French Drain, or soakaway. There may be an opportunity to run the surface water away into a nearby watercourse, if your property is near field ditches, or a stream or river. In these more environmentally-friendly times, surface water can be collected and recycled in other applications, such as water for your garden.

Expect the unexpected

Unforeseen delays can hinder project progress and also become costly additions to your budget. The weather cannot be controlled, of course, but being prepared for it can help. Building in contingency costs can stop the project running aground financially – ideally a contingency fund of 20% but at least 10%. 

Another unexpected cost that you might not have considered is the cost of landscaping the project. The cost-per-square-foot that is usually used to calculate the cost of building an average house does not take into account something like building a drive from the property to the road, or the final creation of the landscaped setting.

Worries about budgeting and hidden costs are widespread when people are considering a self-build. This is why we created our fixed fee, turnkey self-build package. It provides complete peace of mind as it gives you the flexibility to build your dream home around your budget and covers complete build costs. We include everything you need to enable your home to be built and made ready for you to move in. Our quote includes connection costs for supply of water, electricity and gas and connection to a sewer, the cost for supplying and installing kitchen units, sanitary ware, wall tiles, fireplace and flooring. The only additional items you should be aware of are the land cost, any associated legal costs and any landscaping you may wish to do once you have moved in. Talk to us to find out more.